

Thunderstorm Photography Tips
I have been fascinated with Thunderstorms and Lightning Photography for many years and it’s one of those elusive portfolio photographs I have been chasing for a long time.
This year I am determined to get the shot I have always dreamed of and have come very close several times. As frustrating and disappointing failure can make us feel, failure is what makes us better photographers.
I have written a blog post along similar lines before Bad days and Landscape Photography in that there is no such thing as failure in photography. Every journey we take with camera in hand is experience gained and as long as you don’t let those bad days demotivate you there is always something to be learnt or improved upon!
So here I will share with you my Thunderstorm photography tips for getting that epic shot and yes most of them, if not all have come from my own failed attempts.
Before I get into my Thunder and Lightning Photography tips, I will share with you a brief summery of my latest failure so you can see that you are not alone when the inevitable happens and things go wrong but you can skip this and go straight to tips here.
I have been chasing Lightning for a while now and living in the Midlands, we are not exactly blessed with frequent lightning storms. This leads to many long journeys around the UK chasing storms where, I have made several unsuccessful trips to Wales this year. One trip I chased a storm across Anglesey and over Snowdonia which didn’t materialise and I just ended up extremely wet without a single shot to show for my efforts. Oh the Joys of photography!
My last trip started with a Tuesday evening and my eyes glued to the radar in anticipation of a storm hitting the Midlands where I finally gave up at around 23:30 and decided to go to bed as it looked like the storms wasn’t going to miss us.
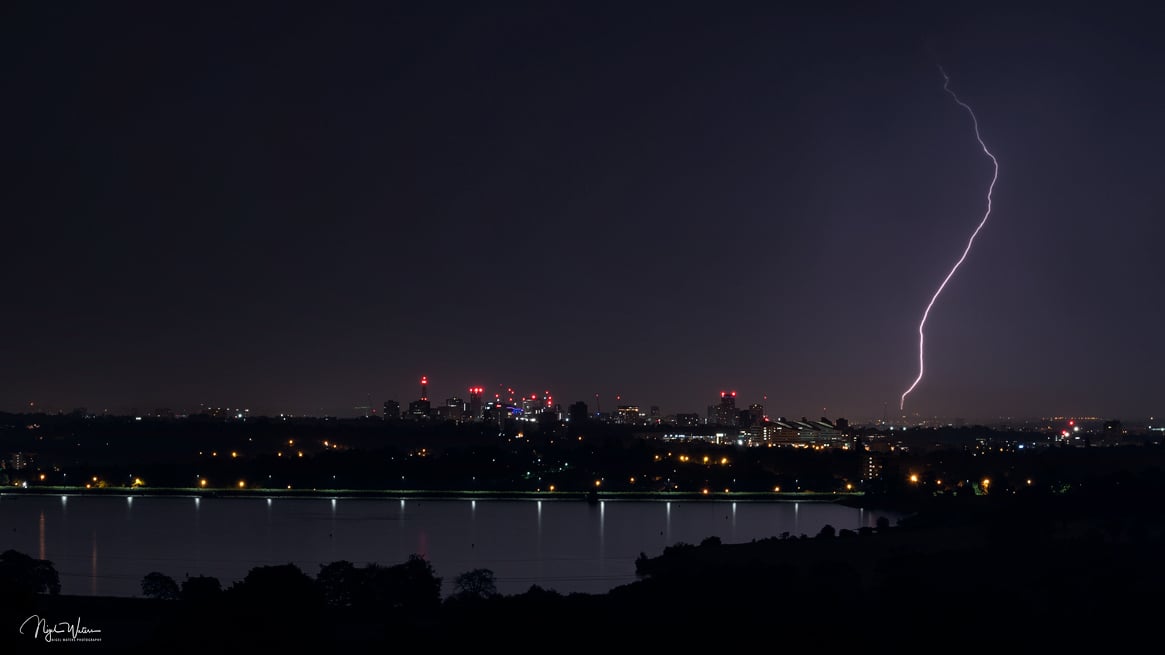
At 1:30am I opened my eyes to a flash through the bedroom window followed by a huge crack of thunder. It wasn’t until the 2nd flash that my brain engaged giving me that kick up the backside to leave a cosy warm bed. I reluctantly grabbed my gear, woke myself up and headed to a vantage point overlooking the Birmingham skyline.
I had visualised this image of Birmingham City skyline illuminated by lightning in my head for years and after a short drive I pulled into the parking area to be greeted by police wandering what the hell I was up to this time in the morning. After a brief chat and them telling me to take care I made the short walk through the trees to setup and catch some Lightning bolts.
Now for anyone that doesn’t know me well enough I do seem to have this knack of being one of those people who always seems to have something happen to them. Maybe one day I will write a book of tales on the joys and tribulations of a landscape photographer and yes this was going to be one of those nights!
I framed my shot set up the intervalometer ready for the storm and heard the police car pull off. No more that two minutes later I heard a car pull up, then another and another. Unknown to me I had actually gone to a place where consenting adults like to participate in lets just say… A little after hours adult entertainment!
What people do in their own time is up to them but it was now 2:00am absolutely hammering it down and lighting kicking off left right and centre. I could hear people in the bushes behind me and to be honest I felt down right scared as it is not one of the best areas in Birmingham to be on your own with very expensive camera gear. After 10 minutes of me being prepared for the worst and not feeling comfortable I decided to grab the camera and make a dash to my car. To rub salt into the wounds as soon as I drove away I could see the lightning flashes over the Birmingham skyline.
While heading home on the horizon I could see another cell starting to kick off in the direction of Droitwich and decided to head over that way and see if I could salvage the night. I arrived at a spot I had previously scouted, grabbed my camera and tripod and wondered off into the field to setup and compose my shot. I got around 10 meters from the car when there was an almighty crack and I could see where the bolt hit the field just in front of me then to my left and then behind.
I looked up and it was directly overhead so I had no choice but to make a dash back to the car. Over the next 30 minutes I witnessed a light show like I had never seen before with one continuous strike after another all around me.
I missed being able to setup and compose my shot by 5 minutes, gutted. In situations like this it is so tempting to get out and quickly setup the camera but no Photograph is worth losing your life over!
As the storm moved eastward, I composed my shot but the lightening had passed me by and was beginning to lose intensity as the cell began to enter its dissipating stage. I got a couple of shots off but didn’t manage to capture that portfolio image I was after.
Another night and another failed attempt to get the image I wanted but as always I learn’t a few things from my experience. Here are my top Lightning Photography Tips I have learnt through experience.
My Lightning Photography Tips
Tip 1: Safety and preparation
It is reported that around 24,000 people around the world are killed by lightning every year and a further 240,000 injured! Although here in the UK it is much less where typically around 30 to 60 people are struck by lightning it is definitely something not to be taken lightly.
Is losing your life for a photograph worth it? There is no way to dress it up Lightning is a killer and photographing it is down right dangerous. One of the first mistakes I made when trying to photograph lightening was trying to get in the thick of the action, KEEP Your distance!
If you are in the core of the storm you will be battling strong winds, heavy rain and possibly hail. It will be popping off left right and center, all around you and you will be frightened to death unless you are a complete nutter on a death wish. This will not produce the best photographs so always try and keep your distance. I try and get around 6 miles minimum from the core of a storm with a good line of site to capture an image. Remember lightning can strike as far as 10 miles away from the center of the storm!
I always keep the ’30sec flash to bang’ rule in the back of my mind when out chasing storms and its a good simple way to roughly gauge where you are relative to the storm. You simply count from the time you see a flash until you hear the thunder and if its 30secs or less then the thunderstorm is less than 6 miles away from you.
Always, always have a getaway plan and have a safe place of shelter in case things get hairy! It will happen as it’s unpredictable and even if you think you are a safe distance away you will be surprised how quickly out of the blue lightening will be on top of you. I personally try and keep within 100 ft maximum of my vehicle where I can try and take shelter if I need to. If not a vehicle then a building but remember the largest killer from lightening is not taking a direct strike but ground current!
This brings me to my next safety tip and hopefully you never find yourselves in this situation where you are caught too far from shelter but if you do keep your feet together, avoid trees, Pylons, metal fences and open land. You certainly do not want to be the tallest object in a field and NEVER lie down which will just give ground current an easier path through your body and heart.
There is no such thing as a safe shelter during a lightning storm and this is why photographing lightning is a seriously dangerous passtime. Did I say how dangerous lightning was? Seriously do not underestimate it! This is not a guide to follow thinking you will be safe but more to make you think and appreciate how dangerous this really is!
Tip 2: Right place, right time. Learn to read the weather!
Sounds obvious but in order to capture lightning you need to be able to anticipate the likelihood of it occurring. I won’t go into the science behind lightning storms and formations here but will focus more on the Apps and Websites I use to give me the best chance of being in the right place at the right time.
Remember trying to forecast lightning especially here in the UK is hard and even when everything looks spot on you will find you get just the odd rumble of thunder or nothing at all. I have tried to review data and localise hotspots within the UK but it is difficult as it certainly has changed over the years. Looking at data from 2017/18 shows significant more activity in the Yorkshire and Humber Regions, east coast of Norfolk and Suffolk, South Wales and Cornwall with 48,765 recorded strikes in 2017. Sounds like a lot but when you look at May 2018 there were anything from 15,000 – 20,000 strikes as a thunderstorm rolled across southern England in one night.
To be in with a shot you need to use a good weather radar and my first go to website is NetWeather TV You can subscribe for their Radar extra for £23.95 which has a 5 minute ATD lightning detection. Another great part of the site is the community where there are some highly well-educated storm chasers on there with invaluable information who give feedback on weather conditions around the UK. You do not need a subscription to view the community forums so I recommend checking them out.
My next website is Metcheck which also has a wealth of information with radar and simulations so you can try and track predicted storm movements. I find this a great site and one to definitely learn and find your way around as the information on there is invaluable with more advanced tools if you want to get into meteorology in a big way.
Another website I use is the live tracker at Blitzortung.org and its historical data. I like the graphical interface and world map to see where strikes are happening around the world and zoom in on specific areas of interest.

My next and possible controversial one is Met Office and also install the app on your phone. I find its short term forecast for the next few hours fairly reliable and it’s also good to get met office weather warnings if they predict lightning within the next 24 hours to give you the heads up and get prepared.
I have struggled to find a decent OS tracking app for my phone with good coverage of the UK for when I am out but the one I do use is My Lightening Tracker. I love this app because you can set a radius from your current location and it will notify you if a strike has been detected. You can use the free app or pay the small fee to remove the adverts. I am currently trialling a number of other apps and if I find any useful I will update this post.
Tip 3: Location, Location
As with all photography have a plan and try to get to know the area well where you can have a good line of site for several miles with an interesting foreground while remain close to your vehicle or suitable building for safety. I am continually on the lookout for ideal places to capture storms from whether on other shoots, holiday or just driving round.
Be aware of your local surroundings as storms can pop up out of the blue and if one kicks off in the middle of the night close to home the last thing you want is to be frantically driving round to find a good place to capture it. That also goes checking for local night time adult activity in parking areas after my last experience!
I have started to compile a list of good locations within a 20 mile radius of my home so I have options when a storm occurs. It is always worth while keeping an eye on locations as they change through the seasons especially farmers fields so you can have a composition and photograph in mind before you arrive there.
Tip 4: Protection from wind, rain and hail
Good waterproof gear is a must as yes you will get soaked. Importantly so will your camera gear so make sure you have a waterproof jacket for your camera with plenty of lens cloths.
One other big tip if you are like me and photograph mostly landscapes with filters make sure you pack your lens hoods. I never normally use lens hoods, these are invaluable in bad weather as it will help protect your lens glass a little from the rain so always remember to pack them and make them one of the first things you pack in your bag.
Tip 5: Camera Gear
You don’t need anything fancy to capture lightning but certain pieces of equipment will help you take better images and make your life a little easier.
I will always have with me the holy trinity of lenses to give me options from 16mm all the way to 200mm but it is really dependant on the storm. Very rarely have I used very wide focal lengths and if I have it was when I was too close for comfort! With cloud to ground lightening I will tend to use wider focal lengths depending on composition and foreground but for cloud to air and intra cloud lightning longer focal lengths can make epic images.
For lightening during the night I find long exposures to be the best option but photographing them during the day can be quite challenging. For this I find a lightning trigger definitely the best option. Without one you can end up with hundreds of images without lightning due to short shutter speeds but it’s certainly not impossible and you can manage without the expense of buying a trigger.
You will need an intervalometer if your camera does not have one built in unless you are some form of lightening god who can pre-empt a strike and press the shutter release at exactly the right time. Failing that if you have a cable release you can just lock it shut and put your camera into continuous shoot mode.
As with any form of Landscape photography a good sturdy tripod is essential and the winds can be excessive!
Another simple, cheap but effective bit of advice is to get some luminous glow in the dark guy rope. I use these all the time now when in bad weather or shooting astrophotography, the wind can be insane, and you don’t want to be sitting in your car with your camera outside praying a gust of wind doesn’t come along and blow over your expensive camera! Glow in the dark rope is great for night shooting so you don’t trip over it!
Tip 6: Camera Settings
When a lightning bolt goes off the amount of light it produced is astonishing so I always underexpose my image by at least 1 stop. Depending on the time of day but if at night I like my exposure around 20-30 secs with as low an ISO as possible and use the aperture to control the exposure where I can. If I think the image is over exposed I will just close the aperture slightly but always keeping it within the sweet spot of my lenses. I will never go to the maximum apertures but instead reduce the ISO. If that is still not enough then I will throw on an ND filter.
With regards to daytime shooting it is more challenging and I will use a 1-3 stop ND filter and the lowest ISO I can. With an aperture at f/13 to f/22 I can get my shutter speeds up to around 1/10 – 1/125s and then use my cameras internal intervalometer or continuous shoot mode with locked down trigger release.
The focus is always set to infinity, and I have pre-marked all my lenses with a line showing where infinity is. This way at night I don’t need to worry about the focus and just make sure my marks on the lens line-up so I know I am focused correctly to infinity.
Lightning Camera Setting Cheat Sheet
[table id=3 responsive=”scroll” /]
These tips are what I have learnt from mistakes over time chasing lightening and are a good base for anyone to start with if they wish to try and catch some bolts.
BUT, remember most of all, be sensible, be aware of the risks and be safe!