

Content Aware Fill in Photoshop: All You Need to Know
There are a lot of Photoshop tips and tricks out there, but finding the one that best fits your needs can sometimes feel like searching for a needle in a haystack. In this tutorial, I’ll show you how to use Photoshop’s Content Aware Fill feature to remove unwanted elements from photos.
Table of Contents
What is Content Aware Fill
The Content Aware Fill tool is an incredibly powerful feature within Adobe Photoshop to remove those unwanted objects in your image. This feature was first introduced in Adobe Photoshop CC 2018 so you will need at least this version or later to make use of this awesome tool.
Content Aware Fill works by analyses the pixels within a selection and compares them to pixels elsewhere within the image. The tool will then attempt to re-create the selection area using its advanced algorithm.
I use it extensively to remove anything from a distracting piece of litter I didn’t see to and inappropriately placed bright yellow tractor after a 3 hour drive to photograph a landscape.
However, it is not just for removing objects. The tool is also invaluable for filling in gaps around the edges of an image when you stitch a panorama of multiple images together.
Let’s dive in and explore the Content Aware Fill tool and how to use it.
Removing Objects Using Content Aware Fill
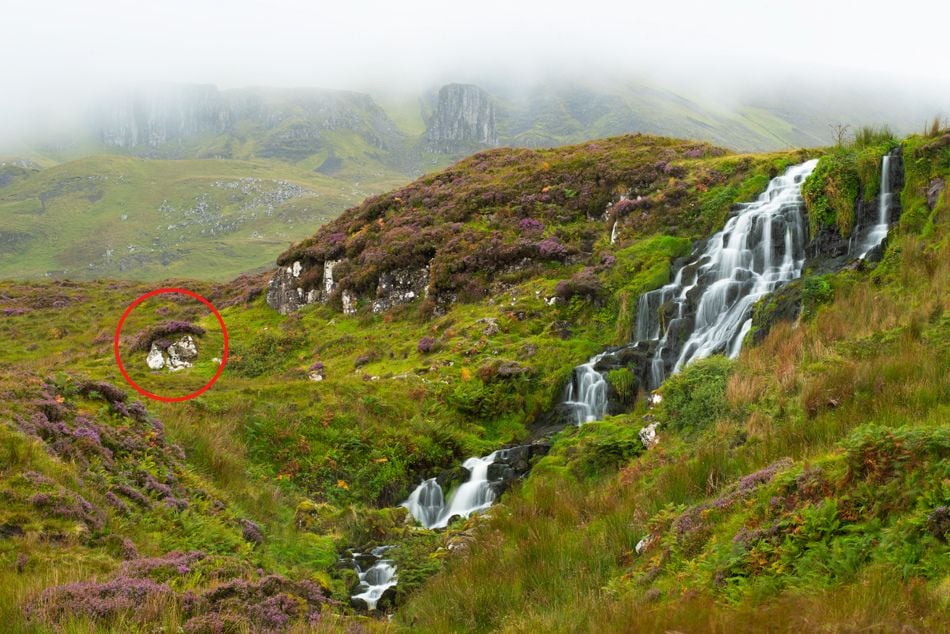
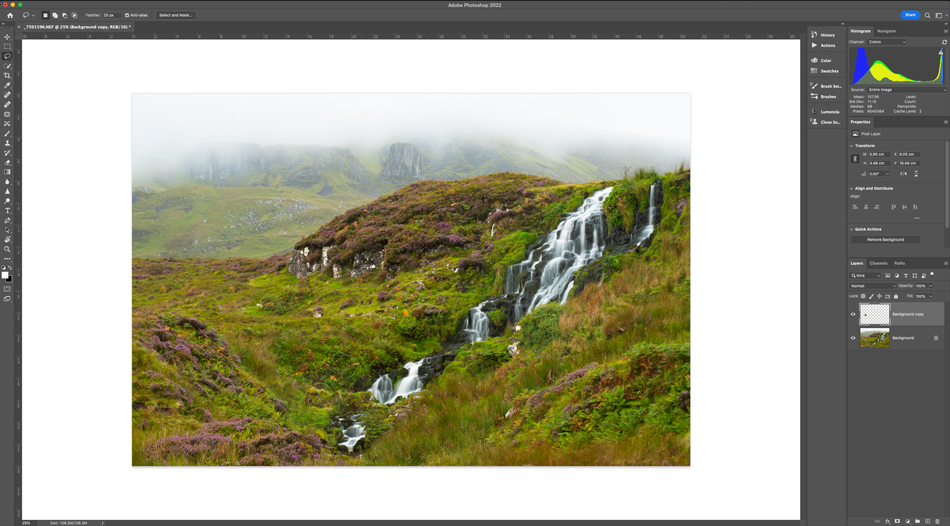
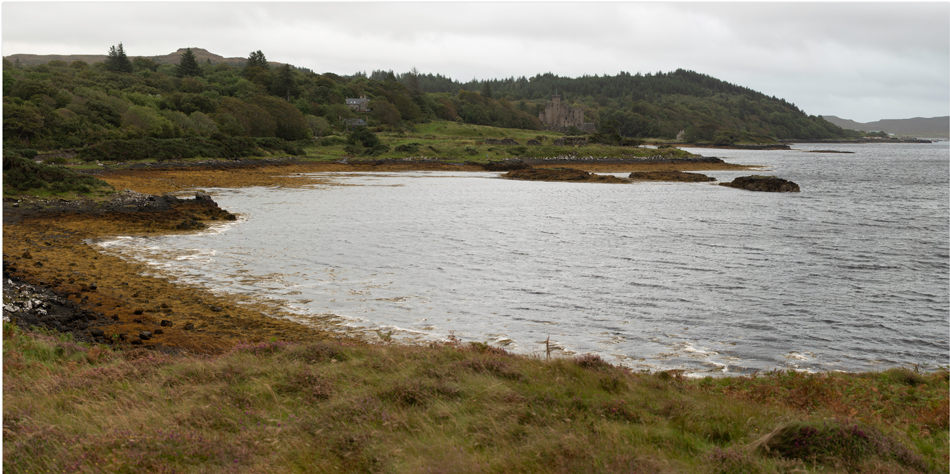
Here is a quick image I took while scouting around in Scotland and lets say for argument sake that I didn’t like the rock circled. This could be a person, car anything that wish you could remove from the image, well Content Aware fill makes it easy.
- Open a copy of the image you want to edit in Photoshop. Make sure it is a copy so you don’t overwrite the original file or use File > Save As and rename to something new.
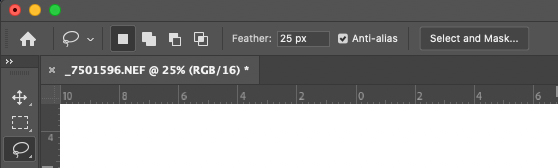
- Select the Lasso Tool and in the options bar set Feather to 25px.
- Drag a selection Marquee around the object you want to remove. Include a little of the area surrounding the subject but this only needs to be approximate.

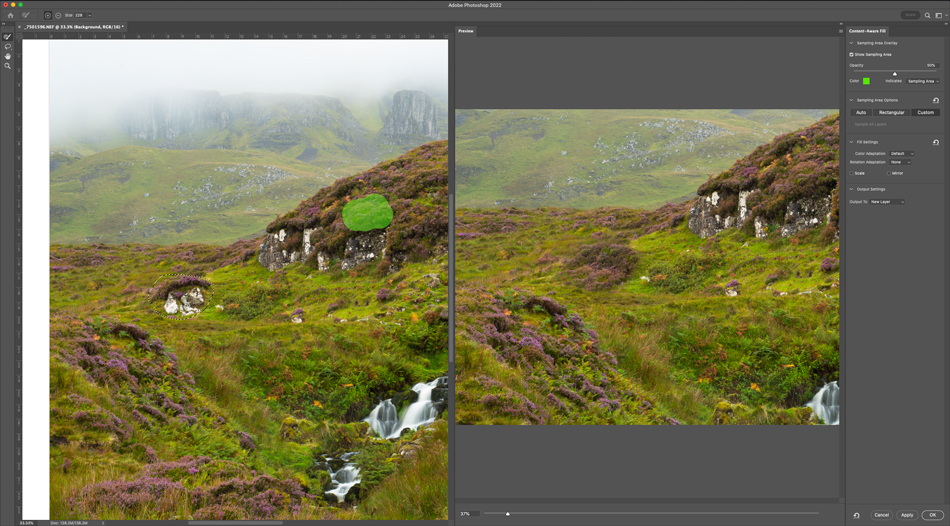
- Chose Edit > Content-Aware Fill to open up the preview panel (Content-Aware Fill Workspace).
The Content-Aware Fill Panel is made up of 3 panels.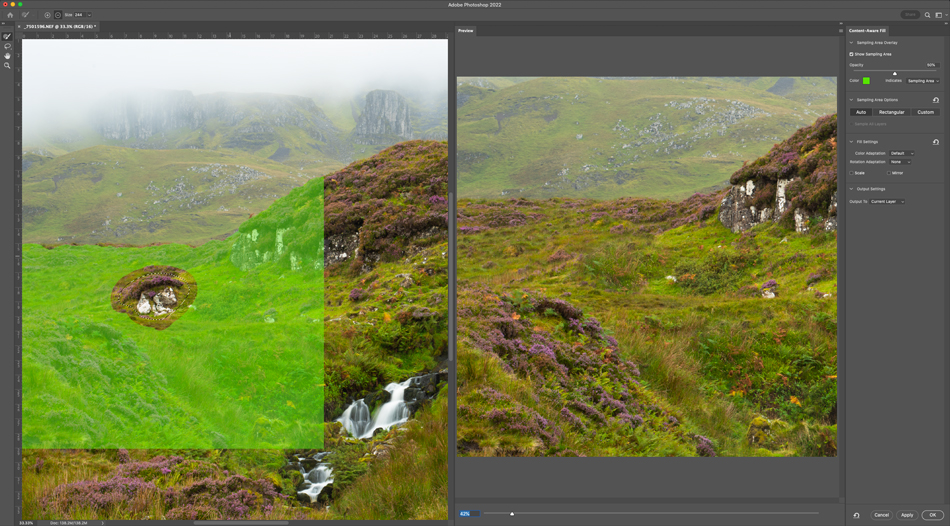
The left panel of the preview window displays the image and the selection you made. The green Overlay (highlighted area) indicates the areas you want the tool to sample for filling the removed area.
In the second panel is a image preview of the result of the sampling area and to the far right the Option Panel with the Edit Menu.
With the current settings the rock and heather are successfully removed but I am not happy with the foliage that it has chosen and think it looks slightly out of place and unnatural. This results can be improved upon by changing the selection area. - Using the sampling brush which is selected by default when you open content aware fill dialogue box you can remove it from the areas you don’t wish to sample. You can alter the brush size from the options bar or simply by press the [ key to make it smaller and ] larger. Note that that a minus sign is in the centre of the brush this is to indicate that it is in subtraction mode.
- Paint over the area you do not want to be sampled in my case I painted over some of the foliage in the foreground. The fill is recalculated as you go along and you can see the updated results in the preview window.
- What I tend to do once I am happy with the result is to try adjusting the Color Adaptation Settings. In this case I thought none gave a better result. One quick tip is to take note of the Output Setting in the options panel before you click OK. If output to new layer is selected the fill is created as a new layer. This is advisable so you are working in a none destructive way not modifying the original image. You can also select Current Layer or Duplicate Layer. Once you are happy with the preview click OK.
This is one method I chose to walk through to give you a basic understanding of how to use the tool. But there is one last thing I want to show you which is better suited to my image and gives me better control and results.
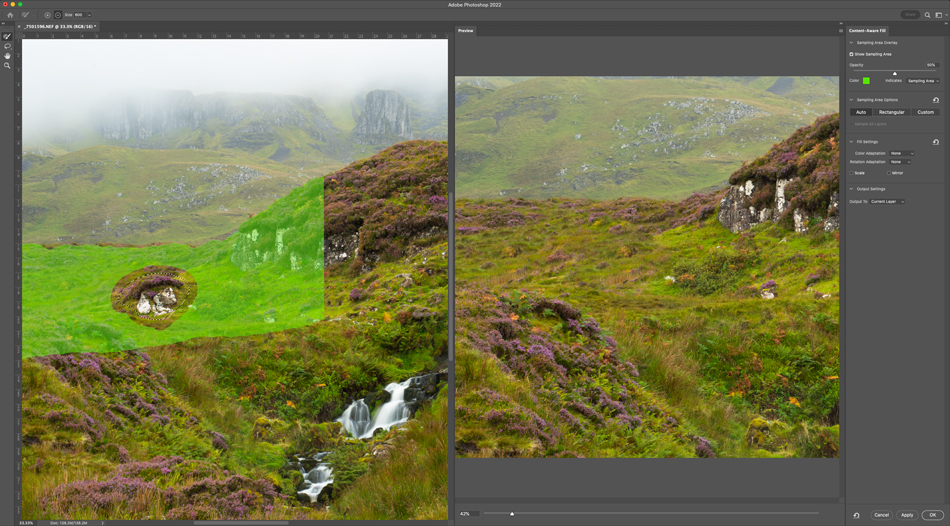
When I look at the final picture with the rock removed it does look like something is missing ideally it would have been better to be filled with some heather. Well this is very easily achieved by simply changing the Sampling Area options.
Again I have selected the rock using the lasso tool but this time I have selected Custom in the sampling area options of the Content Aware Fill dialogue box. When you select custom you will get a box pop up instructing you to use the Sampling Brush Tool to select the area you want to sample.
Here you can see I simply selected some of the heather on the right hand side telling Photoshop to sample this and hey presto this results in the rock being replaced by natural looking heather.
A tip here when using this in complexed images with lots going on is to choose areas to sample around the same distance into the image. This will look more natural especially with flower and foliage so they are of similar size retaining the perspective and look natural. The same also applies to colour and brightness so try and look for similar areas within the image.
Now your image should have the object removed and no one will ever now any different!
Content-Aware Fill Adjustment settings
Sampling Area Overlay
The Sampling Area Overlay settings gives you information about how samples are generated.
- Opacity: You can use the Transparency slider to adjust the opacity of the overlay.
- Color: The current color used for the overlay graphic or by clicking on it the color can be changed.
- Sampling Area / Exclude Area: Tells photoshop whether the selection area is to be included or excluded in when the fill is calculated.
You can use the Transparency slider to adjust the opacity of the overlay.
Sampling Area Options
The Sampling Area options let you determine where you want Photoshop to for sample pixels to fill content.
- Auto: Select for content similar to the surrounding fill area
- Rectangular: Select to use rectangular region around the fill area.
- Custom: Select this option to manually define a sampling are by using the sampling brush tool.
Fill Settings
The Fill Settings feature lets you adjust the intensity of colors, shadows, and textures in the image, making it easier to edit images.
Use the mirror option if you’d like to flip the image horizontally, and use the scale setting to resize it.
- Color Adaptation: Lets contrast and brightness to adapt for a better match. Use this when filling content with gradual color or texture changes. There are four options available in the drop-down-list, None, Default, High and Very High.
- Rotation Adaptation: Allows content rotation for a better match. Use when filling content has curved or rotated patterns such as flowers. There are four options available in the drop-down-list, None, Low, Medium and High.
- Scale: Allows content scaling for a better match. Use this when you are trying to fill content with repeating patterns of different sizes.
- Mirror: This will allow content to be flipped horizontally for a better match. Use when images have horizontal symmetry.
Output Settings
This is where you set how you would like your resulting fill to be outputted.
You can select Current Layer, New Layer or Duplicate Layer.
Quick Content Aware Fill Selection Method
This is probably the Content Aware Fill tool I use most often. Once you have made a selection using your preferred tool you can goto Edit > Fill from the menu bar. Here in its settings under contents you have the option to use content aware fill.
This is awesome at filling transparent edges left over from a Panorama stitch or some other form of image transform.
Lets have a quick look at it in action.
Quick Content Aware Fill Walkthrough
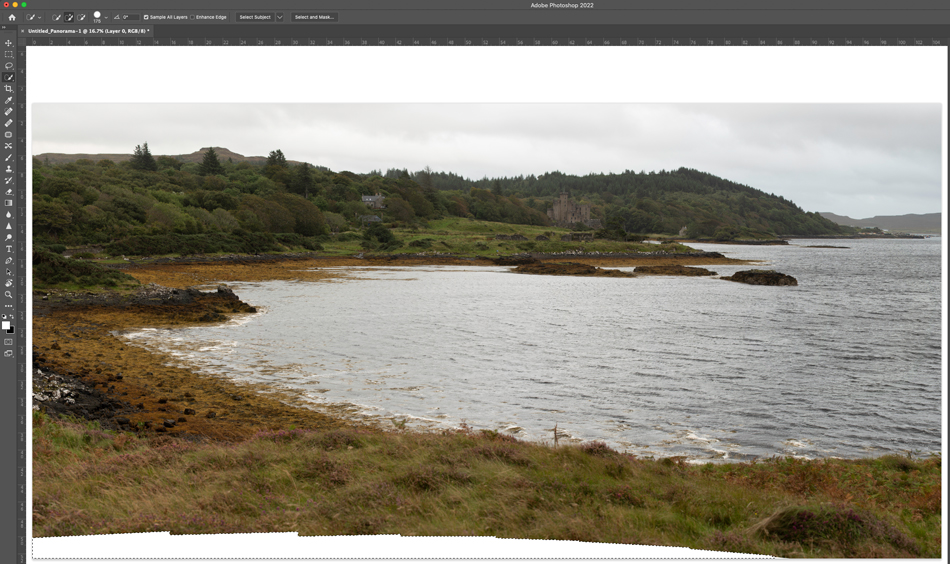
Here I have a Panorama that I have blended/stitched together in Photoshop and if I crop the image to a 2:1 ratio using the Crop Tool we are left with white space at the bottom of the image. Yes I can crop in further but then I will lose the composition that I am looking for.

Instead I can quickly select the white space using the quick selection tool. Tip once you have made the selection goto Select > Modify > Expand and enter a value of around 5px. This just ensures your selection overlaps beyond the whitespace and into the image slightly.
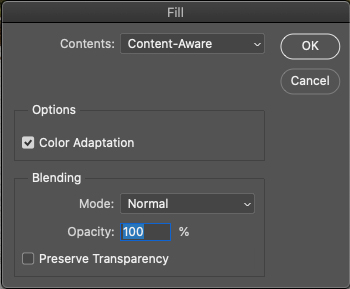
Select Edit > Fill from the menu to open the fill Dialogue box. Under Contents make sure Content-Aware is selected. With color adaption enabled and blend mode set to Normal click OK.
Hey presto content aware will do its best and fill the white space to match your image!
What is Content Aware Move Tool
The Content Aware Move Tool recomposes and blends pixels to accommodate a moved object. You can use it to move a selected object or extend it (duplicate it). When you accept the changes it will attempt to blend the moved object into its surrounds.
This tool I have to admit it is not a tool I really use and prefer to get the composition I want in camera rather than manipulate an image after the event by moving objects around or duplicating them.
I find the Content Aware Move tool works best when used with backgrounds that are consistent so Photoshop can recognise and replicate a pattern. This works well with sky, water, meadows and solid colour walls.
To use Content Aware Move Tool
- Select the Content Aware Move tool from your side bar. On my version it is present but on some it can be found grouped with the Healing Brush and Red Eye tools.
- The tool options bar has two main modes Move & Extend. Select Move if you want to reposition your subject in the image or Extend if you want to duplicate the object.
- With the Content Aware Move tool draw a selection marquee around the subject. If the background is consistent draw it large enough to include a little of the surrounding area.
- Drag the selection to the area in the image you want to place it.
- Control-click (mac) or Right-click (Windows) and now you can use transform to make the subject larger or smaller if you wish by grabbing one of the transformation handles. If you want to reposition the subject position the pointer inside the transformation rectangle and move it. You can also flip the object horizontally if you wish to make it look different if say duplicating a flower by choosing Flip Horizontal.
- Once done simply press enter to accept the move and make the transformation permanent. If you leave the selection selected you can change the colour but if you are finished just choose Select > Deselect.
What is Spot Healing brush with Content-Aware
The Spot Healing Brush tool lets you quickly fix small problems like blemishes, spots, wrinkles, scars and other imperfections in photos. It works by sampling pixels around the retouched area and matched the shading, texture, lighting and transparency of the sampled pixels to the pixels to healed.
This makes it an invaluable tool for retouching blemished in portraits but I use it extensively for cleaning up my images removing dust spots from the sensor.
What is the difference between Spot Healing Brush and Healing Brush tools?
Both the Healing Brush and Spot Healing Brush are similar in that they are used to repair and replace texture in your image. However, the Spot Healing brush differs by sampling from around the immediate surrounding area unlike the Healing Brush Tool where you have to designate a source point.
This makes the Spot Healing Brush tool a very quick and effective way to repair small irregularities in an area such as sensor dust marks. This is where Content Aware comes in with the option selected it turns the Spot Healing Brush into a smart tool where it analyses the surrounding area and attempt to replicate both texture and content for a better match.
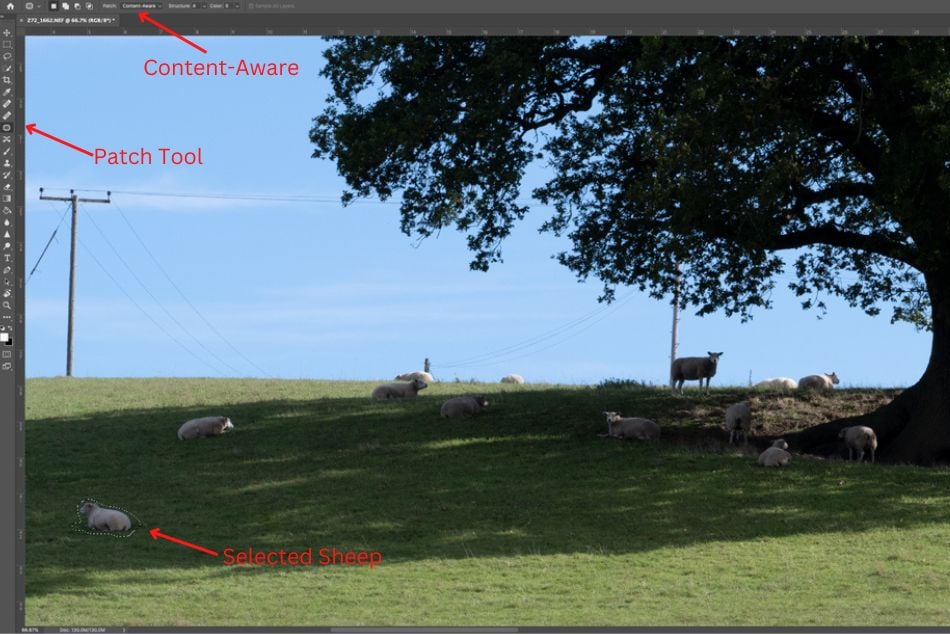
What is Patch Tool with Content-Aware
The patch tool is one of the most powerful tools in Adobe Photoshop and is used to remove larger unwanted elements from an image. For instance if you wanted to remove an unwanted person from your photograph you could use the Patch Tool. Like the Spot Healing Brush tool it comes into its own when used in Content Aware Mode where the Patch Tool will attempt to create seamless blending with nearby content.
You can find the Patch Tool hidden under the Spot healing Brush Tool. To select Content Aware, in the Options bar choose Content Aware from the patch menu.
Let’s have a quick look at it in action. Here is a simple image zoomed in to show some sheep sitting under a tree.
How to use the Patch Tool Easily (Example)
If I wanted to remove an unwanted sheep from the image we could do this effortlessly using the patch tool.
- Simply Select the Patch Tool and Select Content-Aware from the Patch options drop-down menu.
- Draw around the subject you want to remove in this case a sheep.
- Now selected drag the selection area to another part of the image you want to replace it with by holding down the left mouse button. Once released you will see that it will remove the object and blend new selected area into the image.
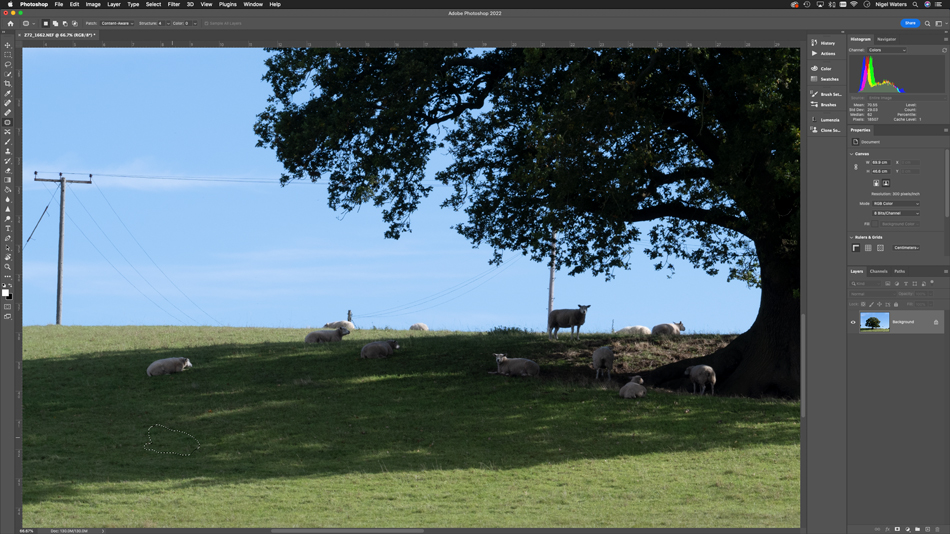
- Deselect the area by simply pressing Cmd & D or from the menu Select > Deselect.
It really is that simple!
There are selectable options under the Structure menu which determines how close the patch reflect the existing image pattern. You can choose from options 1 to 7, with 1 allowing the loosest adherence to the struct and 7 being the strictest.
Color menu allows you to put constraints around how much the source colour can be adjusted and I usually leave this at 0 but is selectable up to a value of 10.
To Conclude: Final Thoughts
Hopefully you have enjoyed this post and now have a good understanding of the Content Aware Fill tool, how to use it and when best to apply it. Also other similar tools that use Content Aware within Photoshop which should now give you the ability to move, remove or duplicate an object within your image. These really are great tools that everyone should now how to use which will speed anyones workflow for editing images.
Go and experiment, practice makes perfect and with time the use of these Adobe Photoshop tools will become second nature.
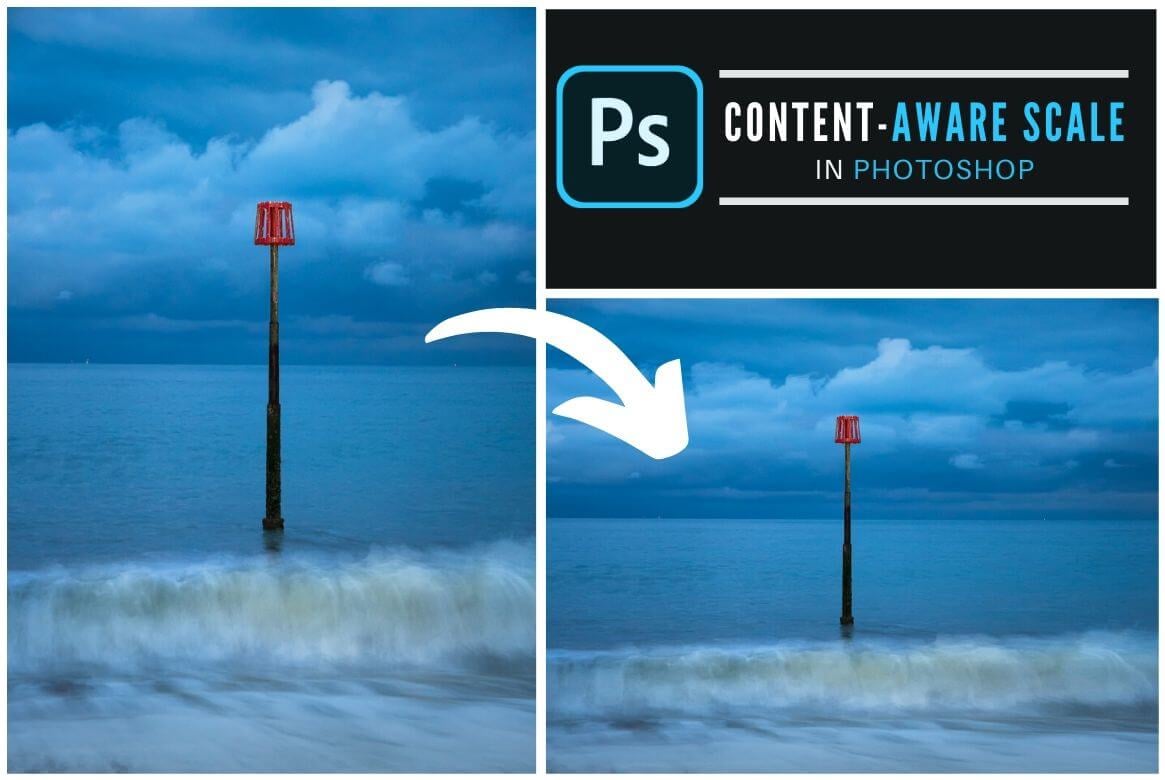
Now you have gotten to grips with Content Aware Fill go and check out my guide on How to use Content Aware Scale here.
With years of experience and a number of award winning photographs Nigel Waters is a UK landscape photographer based in Worcestershire. With a passion for the great outdoors and continually chasing the light to capture beautiful photographs his landscape, seascape and nightscape photography will give you inspiration to get out and explore the best British landscapes have to offer.
May 3, 2023 @ 1:54 am
Thanks, I can improve my photos even more now, I hadn’t explored enough, but thanks to your tutorial, I can go back & back & do more fine turning.
May 3, 2023 @ 4:29 pm
Hi, I am glad you found it useful!
October 20, 2023 @ 9:55 pm
It’s a shame you don’t have a donate button! I’d most certainly donate
to this fantastic blog! I suppose for now i’ll
settle for bookmarking and adding your RSS feed to my Google account.
I look forward to fresh updates and will talk about this blog with
my Facebook group. Talk soon!