

What is a Smart Object in Photoshop
Smart objects are non destructive layers containing image data from raster or vector images such as Photoshop or Illustrator files. You can think of it as a protective container allowing you to edit your image in photoshop without altering the original file.
What are the advantages to using Smart Objects in Photoshop?
The main advantage of using smart objects is that they are flexible and allow filters to be applied non-destructively and can be reopened and settings changed if required.
This is extremely powerful when editing photographs in this non-destructive workflow allowing for future alterations by simply reopening the attached filters and changing settings if you change mind in the editing process. If a client wants to make alterations at a later date or you change your mind and not happy with the final result then Smart Objects make it very easy to correct.
Other benefits are when using Transform or Warping layers where you can resize, rotate, skew, distort perspective etc without losing any of the original image quality. With a normal rasterized layer, as you resize the image its quality is degraded but as a Smart Object it can be transformed as much as you like without it losing quality.
If your image or design is quite complex you can place groups of layers inside a Smart Object and process them individually. You can also place several Smart Objects inside another Smart Object which is known as Nested Smart Objects allowing you to do tasks which otherwise would be very difficult to do such as multiple stroke Layers Style graphical effects.
This really unlocks the full potential of editing in Photoshop where you can work on your projects nondestructively making changes as you go along.
The benefits of using smart objects
- Use with other filters
- Nondestructive filters
- Nondestructive transforms retaining original quality
- Edit one smart object and automatically update all linked instances
- Use multiple non destructive layers
- Use multiple Smart Objects with one Smart Object (Nested)
- Image averaging to reduce noise
How to create a smart object in photoshop
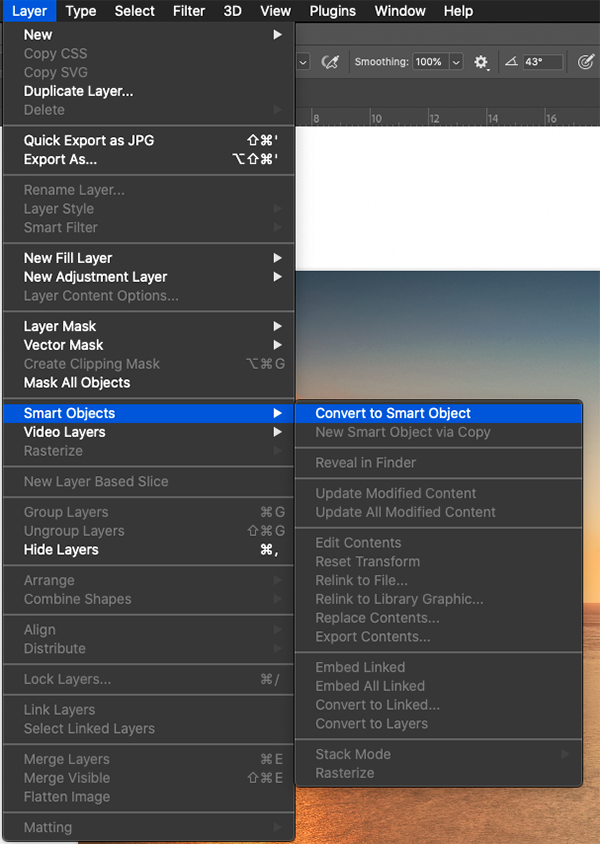
To convert a layer into a Smart Object just go to the layer menu and choose Smart Objects > Convert to Smart Object
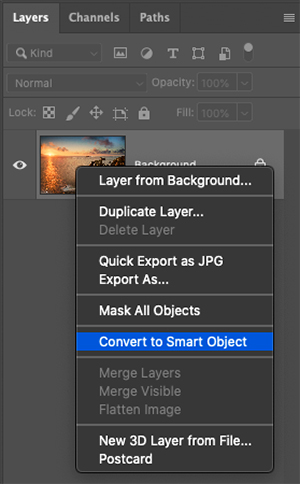
Alternatively you can easily convert a layer into a Smart Object by right clicking on the layer and selecting Convert to Smart Object
Smart Object Shortcut keys
The are no predefined short cut keys in Photoshop for converting a layer to a Smart Object.
Pro Tip! You can easily define your own shortcut keys by going to the Edit menu and selecting Keyboard Shortcuts. Here you can easily set shortcut keys for the Convert Smart Object function.
How to convert Smart Object to normal layer in Photoshop
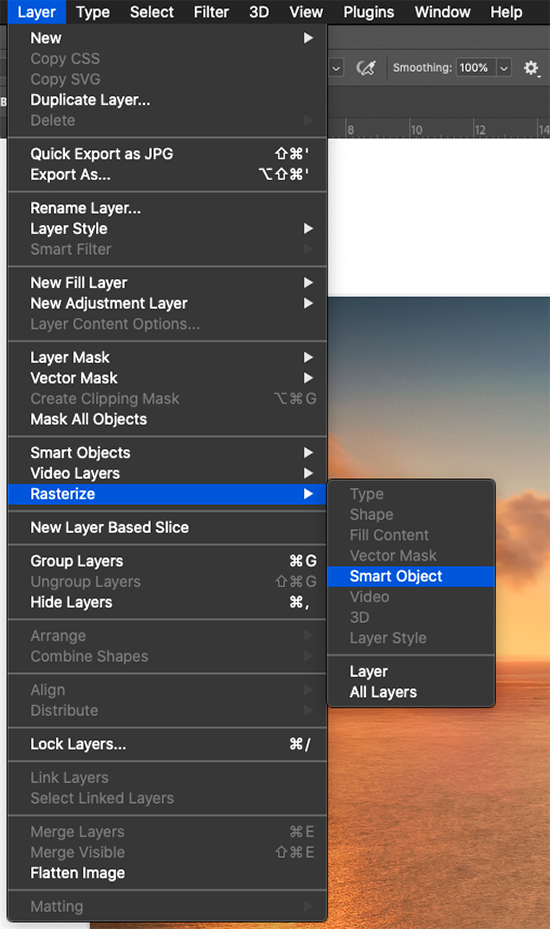
To convert a Smart Object to a normal layer with the Smart Objected selected goto layer menu and choose Rasterize > Smart Object
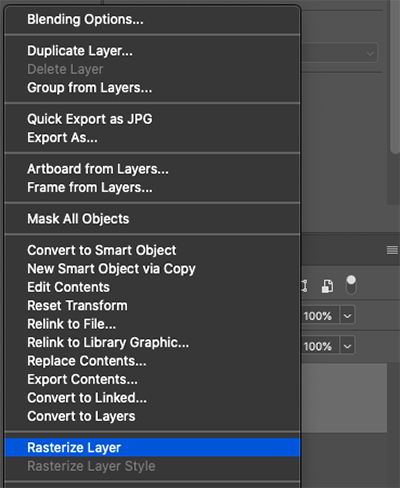
Alternatively you can easily convert a Smart Object into a normal rasterise layer by right clicking on the layer and selecting Rasterize Layer
Disadvantages of smart objects in photoshop
While there are great benefits to using Smart Objects there are also a few disadvantages you need to be aware of.
The layer is protected inside of the Smart Object container and therefore its pixels cannot be directly edited. This means for instance that you cannot perform dodging and burning, cloning, dust removal or paint directly onto the Smart Object.
Although this is regarded by many photographers as a disadvantage for me it really isn’t an issue as there are simple work arounds. For instance it is possible to directly edit a Smart Object by simply double clicking on the layer which will open the Smart Object in another window for editing. Or the way I prefer to work is on individual layers within the Smart Object giving me total control. Alternatively simply copy the Smart Object and place it on the layer above to make minor corrections on it such as dodging and burning.
Another disadvantage to be aware of is file size. Yes like everything in life where there are pros there are cons and with Smart Objects it is the increase in file size. With todays extremely large hard drives this might not seem much of an issue but believe me as a photographer and you build your portfolio and client base this increase can have a large impact over hundreds of files.
But this is a small price to pay and of course once your project it completed you can simply merge all your layers and significantly reduce the size and store it away. However I strongly do not recommend doing this because there will be times in the future you might want to make simple changes and keeping them as Smart Objects is a huge advantage.
I did a very simple comparison of a file with a single rasterized layer and then converted that same layer to a Smart Object to show the difference in file sizes. The original file size was 434.9 MB but the Smart Object file is 705.5 MB.
![]()
The disadvantages of using Smart Objects
- Pixels cannot be directly edited
- Increase in file size
Should you use Smart Object in Photoshop?
The benefits out way the negatives for the use of Smart Objects in Photoshop. You might have to slightly change the way you work in Photoshop but the advantages it gives is why I use them extensively as a major part of my workflow when editing my photographs.
As a photographer one thing I can not stress enough is letting your images age. Once you think you have finished your image editing rather than publishing or printing straight away give it time and let your eyes and mood adjust. After a few hours or days review your edit and see if it is still exactly the way you like it. If not then Smart Objects allow you to easily make changes which really simplifies your editing process and ultimately leads to better quality images.
You can find more informative posts like this one in my Landscape Photography Blog
With years of experience and a number of award winning photographs Nigel Waters is a UK landscape photographer based in Worcestershire. With a passion for the great outdoors and continually chasing the light to capture beautiful photographs his landscape, seascape and nightscape photography will give you inspiration to get out and explore the best British landscapes have to offer.