

How to create Orton Effect in Photoshop
There are not many editing techniques I use frequently when I process my images and instead I prefer to follow a simple workflow of making basic corrections to White Balance, contrast and colour. However one of the very simple techniques I do use regularly and what I recommend you to try out and learn is How to create Orton Effect in Photoshop.
The Orton effect is a fantastic way of adding an etherial glow effect in photoshop and with many different ways to create it I find this method the best. It is very fast and simple to implement with the final result customisable so it can be easily tailored to give the look you want to your photographs.
What is the Orton Effect
The Orton Effect is one of the most popular editing techniques used in Landscape photography today and was developed by Michael Orton in the 1980’s. The original technique was born out of his efforts to imitate watercolour colour paintings by laying two or three transparencies over each other of the same composition. The first being in focus and over exposed with the others being colour components which are out of focus and over exposed.
This technique has developed over the years with the introduction of digital photography and sophisticated software editing packages such as Photoshop which has lead to many different ways in creating the look but something anyone can create quickly in a non-destructive way creating that etherial dream like glow to an image.
When to use the Orton Effect
Artistic licence these days gives you the ability manipulate images to create work that realises your vision and depending on the style and look you are after the Orton Effect maybe a technique you find yourself using time and again.
Although there is nothing wrong with creating strong etherial dream like images I prefer to keep it subtle within my own photographs where I work on the premise that if you can tell that a technique has been applied then for me it is too strong. I like my images to be natural and as close to the original scene as possible and use a technique only if required to accentuate parts of an image to convey a message to the viewer.
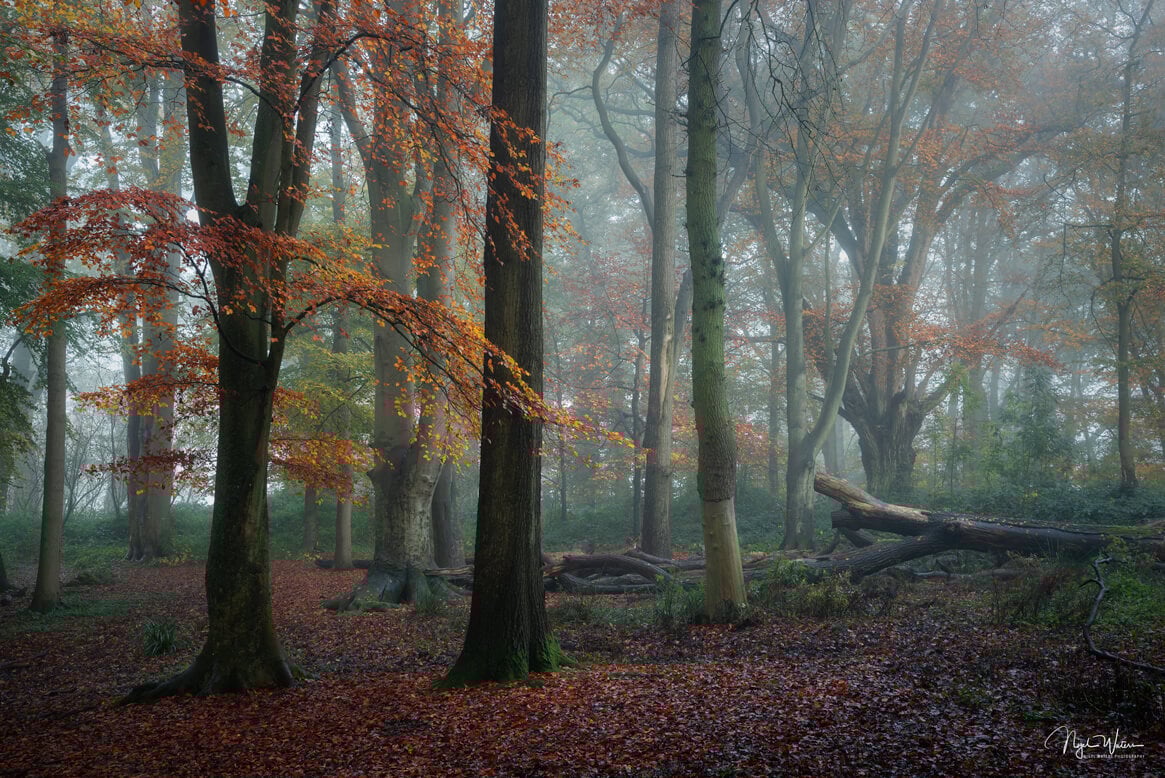
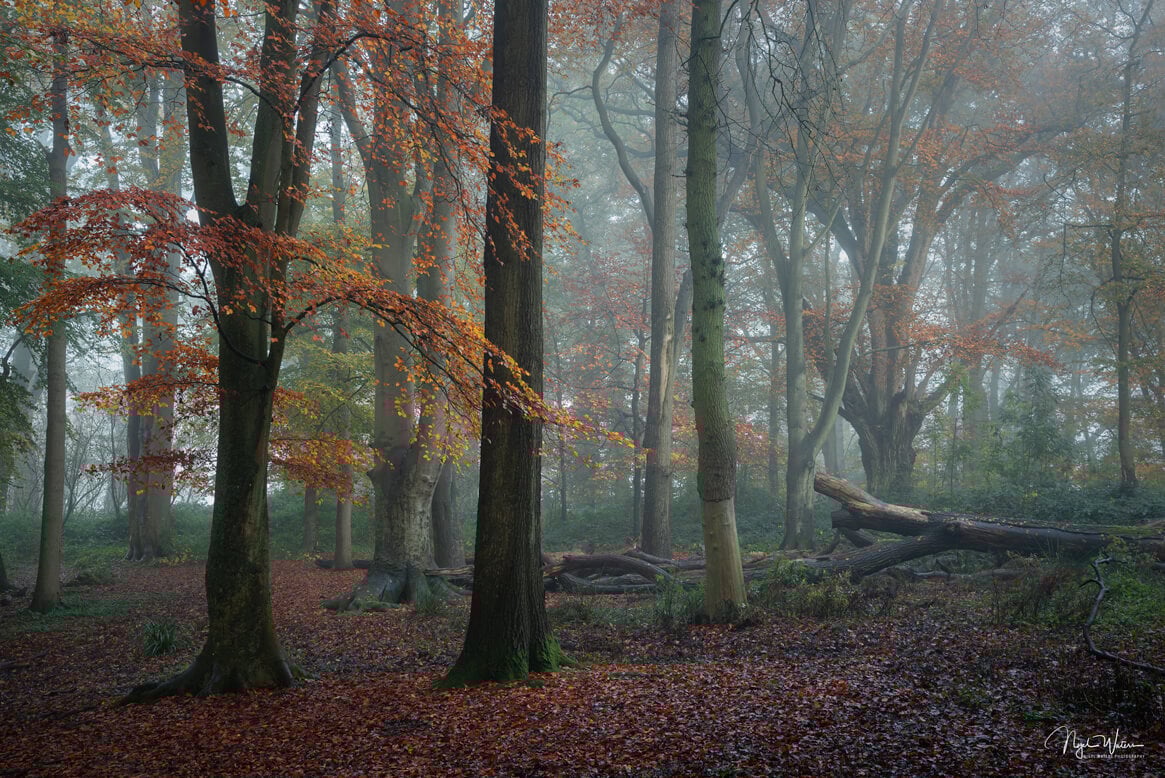
Todays cameras and lenses are so good that sharpness and contrast becomes an issue because I don’t see a scene as well as a camera does, maybe its due to my eyes deteriorating with age but sometimes I look at my raw images and they just look so unnatural and distracting. This is especially the case in my Forest and Woodland work where a scene is naturally chaotic and key elements that I wanted to capture can easily get lost in a sea of distractions.
So you could say I like to use the Orton Effect as a subtle highlighter brushing over the areas of a scene I want to identify and dampening down the elements I don’t want to catch a viewers immediate attention. This works extremely well in forest scenes simplifying a scene removing that crunchy chaotic feeling and why I use it sparingly most of the time on these types of images.
How to create Orton Effect in Photoshop
1. Duplicate your original image background layer and rename Orton Effect to keep your process flow nice a tidy. Then from the main menu goto Image/Apply Image.. and select Bending Mode ‘Screen‘
Leave Layer as Merged, Chanel RGB, Opacity 100%, Preserve Transparency and Mask unchecked.

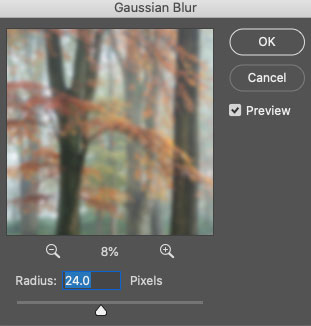
2. Duplicate Orton Effect Layer then with the new layer selected from the main menu select Filter/Blur/Gaussian Blur..
Select desired Radius value in pixels you require. I always use the megapixel size of the camera I was using to capture the image, therefore if you used a 24 Megapixel Camera then select a value around 24. This does not have to be exact but a good rule of thumb I find to create your blurred layer.
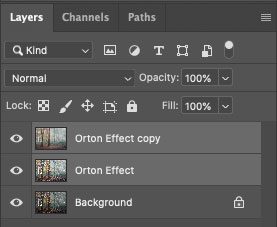
3. Select both of the Orton Effect Layers and merge them together.
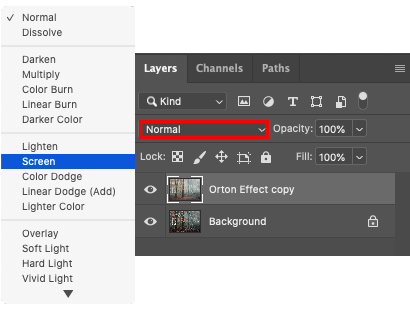
4. Select the merged layer and change blending mode to Soft Light.
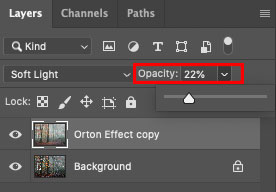
5. Once you have created the Orton Effect adjustment layer adjust Opacity to vary the amount of Orton Effect to apply and create the overall look you are after.
The final amount will vary to taste but I personally never exceed 25% as I like it look realistic and not obvious that the Orton Effect has been applied.
Helpful Adobe Photoshop shortcut keys to use
| Photoshop Reference | Mac Keys | Win Keys |
|---|---|---|
| Duplicate Layer | Cmd + J | Ctrl + J |
| Merge Selected Layers | Cmd + E | Ctrl + E |
| Save | Cmd + S | Ctrl + S |
| Save As | Shift + Cmd + S | Shift + Ctrl + S |
Try out the Orton Effect for yourself
You can see how easy and quick this method is to create the Orton Effect in Photoshop in just 5 simple steps but like I said earlier there are a number of different methods you can use. This technique is great for creating mood and giving your images that etherial soft glow and soften the overall look of your final edited photograph. If you would like to know any of the other methods then let me know but I find this simple method creates the desired subtle look I want and find it the best method overall for my workflow.
If you would like to read more informative posts like this then check out my Landscape Photography Blog