

The 500 Rule in Photography
One of the most rewarding and challenging photographs to take is a night landscape illuminated by just a sky full or stars which for me personally is one of the most enjoyable although frustrating at times especially here in the UK due to the weather. If you are into nightcapes, photographing the night sky over a beautiful landscape then you would have heard of the “Rule 500 in Photography” also known as the “500 Rule” or even the “Rule 600” which works on the same principle.
If you read my blog posts regularly or have been out on a photoshoot with me you will know my personal thoughts and dislikes to defined rules in photography but this is a good starting point in helping you capture those beautiful night landscapes that will wow your audience and give you photographs to be proud of.
What is the 500 Rule in Photography?
Basically it is a method that astro-photographers use to determine the length of their exposure time to maintain points of light given off by the stars to minimise blurring and star trails caused by the rotation of the earth.
The rule is very simple for full-frame equivalent cameras where you divide 500 by the focal length to give you the maximum exposure time in seconds to use. For example the maximum exposure time for a 24mm lens based on the 500 rule would be 21 seconds (500/24=20.8s).
You can still calculate the maximum exposure time for APS-C crop sensor camera following the same principles but need to take into account the crop factor of the camera 500/(crop factor * focal length).
For example Nikon DX cameras have a crop factor of 1.5 therefore if using the same 24mm lens on one of these cameras the maximum exposure time would be 14 seconds 500/(1.5*24)=13.9s.
It very important to point out that this method is just a very simple rule of thumb guide and will still produce blurring and trailing on larger prints where I use a value of 400 instead of 500. This will still produce star trails on large prints but I find it more manageable than using a value of 500.
Maximum time in seconds before stars begin to blur using the both rules
| Focal Length | 500 Rule Full-Frame | 500 Rule APS-C Crop | 400 Rule Full-Frame | 400 Rule APS-C Crop |
|---|---|---|---|---|
| 14mm | 36 | 24 | 29 | 19 |
| 15mm | 33 | 22 | 27 | 18 |
| 16mm | 31 | 21 | 25 | 17 |
| 17mm | 29 | 20 | 24 | 16 |
| 18mm | 28 | 19 | 22 | 15 |
| 19mm | 26 | 18 | 21 | 14 |
| 20mm | 25 | 17 | 20 | 13 |
| 24mm | 21 | 14 | 17 | 11 |
| 28mm | 18 | 12 | 14 | 10 |
| 30mm | 17 | 11 | 13 | 9 |
| 40mm | 13 | 8 | 10 | 7 |
| 50mm | 10 | 7 | 8 | 5 |
| 70mm | 7 | 5 | 6 | 4 |
| 80mm | 6 | 4 | 5 | 3 |
For best results using the above values round down to the closest available camera shutter speed. The exact shutter speed can be used via an intervalometer.
Using a value of 400 will give 20% less blurring than what you can expect from using the 500 rule and where I always start from when setting my shutter speed exposing for the night sky. If you are shooting multiple images to stitch them together later as a panorama then I find using a value of 500 adequte due to the final image being so much larger than a single image taken with the same focal length lens.
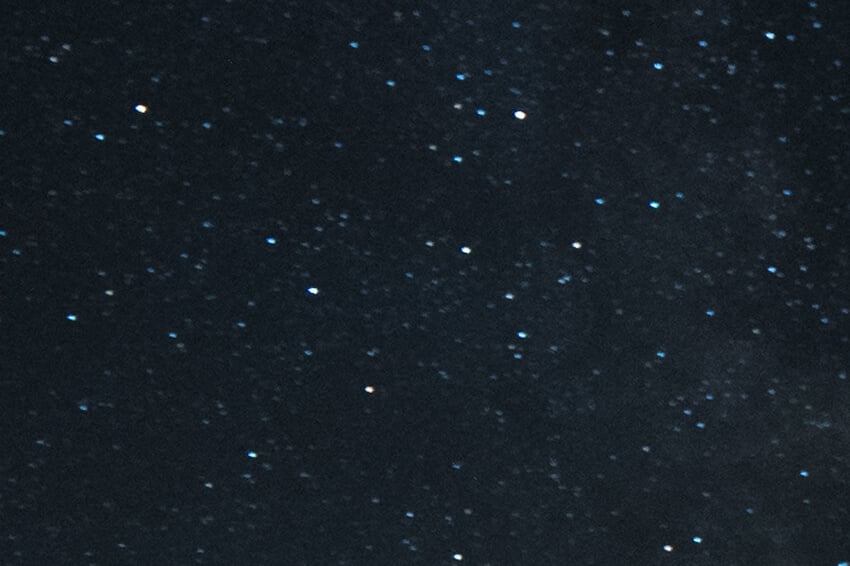
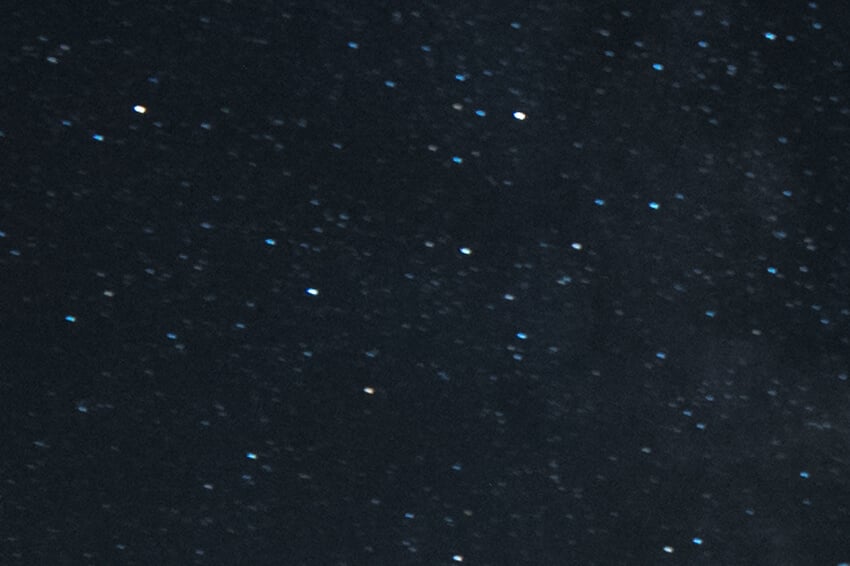
To illustrate the difference between the rule values here are 2 RAW files of the same image taken at both 30 seconds and 25 seconds zoomed in, although the difference is slight you can see that 25 secs is better with the stars less blurred and smaller trails.
Balancing shutter speed with ISO
The trick to getting the best exposure for the night sky is a balancing act between shutter speed and ISO knowing your camera limitations and how far you can push the ISO while still maintaining a workable final image. Knowing the noise suppression ability of your camera and the ISO cut off point which you feel comfortable with will quickly narrow your choices and which value is best to use.
Even though the noise suppression in my camera is very good I very rarely go above an ISO of 3200 unless in extreme circumstances. My starting point is always with a ISO value of 2500 and using 400 to calculate my shutter speed I can very quickly get close to my optimum settings. I then review the histogram and make any minor tweaks required for my desired exposure.
Your photo editing technique will also be a factor here on what amount of noise you feel comfortable with removing. You can read about the noise reduction techniques I use and what I feel are best here How to reduce noise in Photoshop
There is one final factor that can play a part in the decision of what rule value to use and that is maximum print size you will be printing at. If your final print is only going to be 16″ x 24″ then you will hardly see any difference between the two but it will become more apparent as you increase the print size. I personally never want to limit my print size due to notable star trailing and always try to use the shortest exposure time I can get away with and why I always use 400 not 500 but it is something worth bearing in mind.
Use the 500 Rule as a guide, get out, experiment and capture some awesome images
Think of the 500 Rule in photography as a rule of thumb guide to roughly give you a required exposure time and then tweak as necessary depending on conditions, equipment and what level of Noise and Star movement you can live with. Like everything in photography the best way to nail those killer shots is to get out and practice where you will very quickly hone in on the best settings for you and your camera setup.